Free Motion Trail Effect Tool: Add a Motion Trail to Any Product Photo Online
10 min read
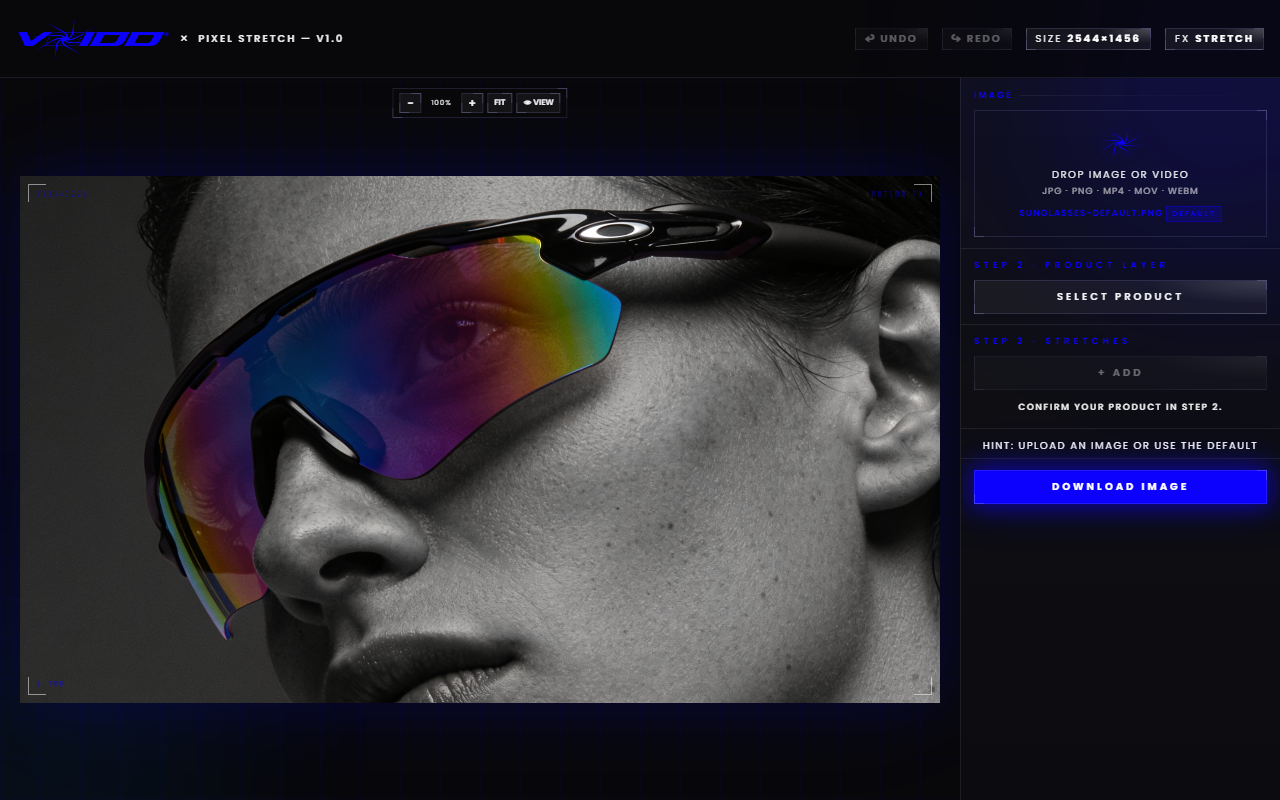
A motion trail effect tool takes a still photo of an object and draws a streak of pixels behind it, so the object reads as moving even though the camera never did. Pixel Stretch from VOIDD is a free one that runs entirely in your browser: upload, cut out the product, drag a trail, export at full resolution. No download, no account, no watermark.
That is the short answer. The rest of this guide covers how the effect works, how to make one that looks intentional instead of smeared, how a motion trail differs from motion blur, and what to check before trusting any tool that calls itself free.
What is a motion trail effect?
A motion trail is a directional copy of an object's edge pixels, stretched or repeated behind it along one axis. The subject stays sharp. The trail behind it carries the sense of speed. It borrows the visual grammar of long-exposure photography, where a moving light leaves a streak, and applies it to a product that was sitting perfectly still on a table.
Your eye already knows the rule. Sharp thing plus streak equals movement. Designers have used it on sneaker launches, energy drink cans, watches, cars, anything that benefits from feeling fast. The reason it works on a still image is that the brain fills in the motion from the streak, not from any actual change between frames.
The effect has two ingredients and they must stay separate: a clean subject and a trail that begins at the subject's edge and fades away from it. When those blend into one another you get a smear, and a smear says "bad photo" rather than "fast product."
How do you add a motion trail to a photo online for free?
Open the free Pixel Stretch tool, upload your product photo, and click Select Product so the built-in cutout separates the subject from its background. Drag a stretch band away from the direction of travel. The band pulls the edge pixels into a trail. Export a full-size PNG. The whole job takes about two minutes.
Here is the process step by step.
- Upload the photo. Any JPG or PNG up to 20MB works, and the tool also accepts an MP4, MOV or WEBM clip as the source frame. A clean background with some contrast against the product gives the cutout the least to argue with.
- Select the product. One click runs the cutout. If the mask clips a corner, use Refine Edges before adding any trail, because every band inherits the mask.
- Add a stretch band. Place it on the side of the product that faces away from the implied motion. A shoe travelling left gets its band on the right.
- Set the length. Start at roughly a third of the product's width. Push further only if the product should look like it is falling or launching. Presets cover the common looks, and a band can bend along a curve if a straight streak looks too mechanical.
- Export. Enter an email and the full-size PNG is sent to your inbox, with no watermark and no account to create.
Each band lives on its own layer and only the active layer answers to your mouse, so adjusting one trail cannot disturb another. That matters more than it sounds. Most free effect tools apply one global smear and give you a single slider; the moment you want a second trail or a different angle, you are starting over.
What makes a motion trail look real instead of smeared?
Three rules separate a convincing trail from a filter accident: the trail goes behind the subject and never ahead of it, its length matches the speed you want to imply, and there is exactly one direction of travel per image. Get those right and even a crude trail reads as motion. Break any one and the image reads as a mistake.
A little more on each.
Direction. A trail that leads the object looks like a printing error. Ask yourself where the product came from, and put the trail there.
Length as velocity. Short trails say drift. Medium trails say thrown. Long trails say falling or fired. Pick the verb first, then set the length to match. A perfume bottle should probably drift. A basketball can be thrown.
One vector. Two trails pulling opposite ways cancel each other and the eye gives up. If you want a scattered, exploding feel, that is a different effect and it needs the pieces to share one origin point.
Keep the subject sharp. The trail carries the motion so the product does not have to. If you soften the product itself, you have made motion blur, which is the next section.
Motion blur vs motion trail: the difference
Motion blur softens the object itself, as if the shutter stayed open while it moved. A motion trail keeps the object sharp and adds a streak behind it. Blur costs you detail on the product. A trail keeps every logo, seam and reflection legible while still saying "fast." For product images, the trail almost always wins.
People searching for a way to add motion blur to an image online are usually after the feeling of speed, not the loss of detail. The blur tools from the big photo editors deliver the feeling and the loss together. That is fine for a background element or a car on a road, where the environment is the point. It is a bad trade for a product shot, where the thing you are selling is the detail.
There is a hybrid worth knowing. Apply a strong trail, then a very slight blur on the trail only, never on the subject. The trail softens into something closer to a photographic streak while the product stays crisp. That needs an editor which keeps the trail on its own layer, so the blur can reach the trail without touching the product.
If you want the full walk-through of the motion question, including when a trail is the wrong tool entirely, the guide on how to make a product look like it is moving covers it.
Do you need Photoshop for a motion trail effect?
No. The classic Photoshop route is to select the subject, duplicate the layer, apply a directional blur or a smudge, mask it back, and repeat for every adjustment. It works, and it takes about fifteen minutes plus a subscription. A browser motion trail tool does the same job in two minutes, with the layer separation handled for you.
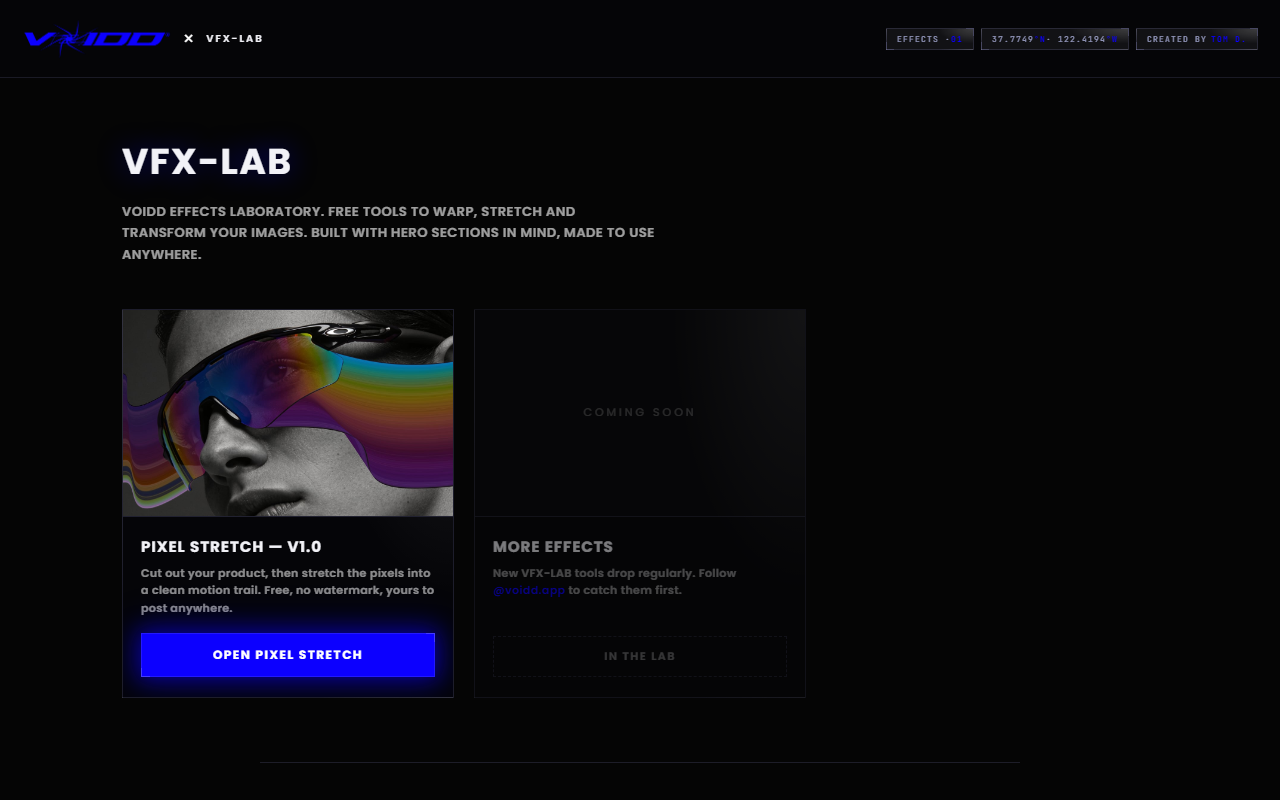
The Photoshop tutorials that rank for "pixel stretch effect" are a good education in what the effect is made of. Read one once, or read the pixel stretch effect in Photoshop, Photopea or the browser guide, which lays the two methods side by side. Then notice that every step in them is a manual version of something a purpose-built tool does automatically: the selection is the cutout, the duplicated layer is the band, the smudge direction is the drag. Nothing is lost by skipping the manual version except the afternoon.
Where Photoshop still earns its place is compositing many elements into one scene, or retouching the product itself. For the single job of "make this product photo move," it is overkill.
Products that suit a motion trail
Anything with a clear silhouette and an obvious direction of travel: sneakers, bottles, cans, watches, headphones, sports gear, anything that gets thrown, poured, dropped or launched. Products with soft or fuzzy edges, like knitwear or plush toys, fight the cutout and give the trail a ragged edge to start from.
A short list of what works and why:
- Sneakers. The most common use for good reason. A shoe already implies a foot in motion.
- Drinks. A can or bottle with a trail reads as tossed, and a tossed drink reads as cold and fun.
- Watches and jewellery. A subtle trail, a third of the width or less, gives a luxury item a sense of weight and swing without cheapening it.
- Tech. Headphones, phones, controllers. The trail pairs well with a dark, clean background.
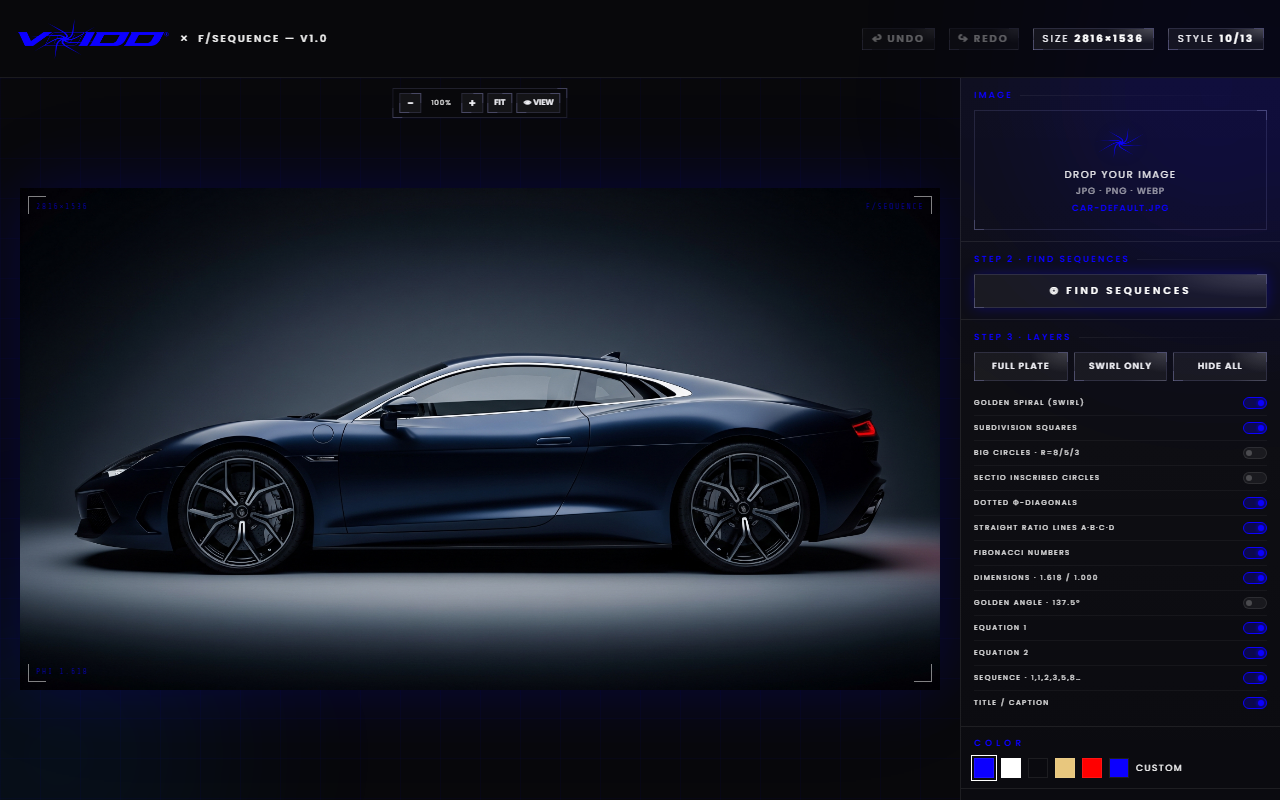
Whatever the product, frame it before you add the trail. The free Golden Ratio tool overlays a Fibonacci spiral so you can place the subject where the eye lands first, and leave the trail room to breathe on the opposite side.
Is a free motion trail effect tool actually free?
Check three things before you trust the word "free": does the export carry a watermark, is the output capped below your original resolution, and does the download require you to create an account or start a trial. A tool that fails any of them is a demo with a free label. Pixel Stretch passes all three: no watermark, full resolution, and the file is simply emailed to you.
That is not a boast so much as a consequence of where the tool sits. VOIDD makes animated hero sections for Shopify. The free effect tools in VFX-LAB exist to show what a moving product can do for a store, so there is no reason to cripple the export. The paid product is elsewhere.
The three tests, in the order they usually bite:
- Watermark. Look at the corner of the exported file, not the on-screen preview.
- Resolution. Compare the export's pixel dimensions with the upload's. A 2,000-pixel photo should come back at 2,000 pixels.
- Account wall. If the download needs a login and a plan, the tool is a subscription funnel wearing a free badge.
For a wider survey of what browser tools can and cannot do compared with installed software, the free VFX software guide sets out the honest boundaries.
Where a motion trail image goes: heroes, product pages, ads
Hero sections, product pages, ads and social posts, roughly in that order of impact. A hero is the biggest canvas a store has, and a product that appears to move across it is the single fastest way to stop a scroll. On a product page the trail works best as a secondary image, after the clean shot that shows what the customer is buying.
Two practical notes. Keep one clean, trail-free image in the set: the trail sells the feeling, the clean shot sells the object. And match the trail's direction to where the eye travels on the page, so the streak points the reader toward the headline or the button rather than off the edge.
If you want the trail to move for real inside a Shopify theme, without exporting anything, that is what VOIDD's animated SupaHero sections do. Drop the section into the theme editor, pick the product, and the motion is built in, no code needed.
FAQ
What is the best free motion trail effect tool? For product photos, a browser tool that separates the subject from its trail on independent layers, exports at full resolution and adds no watermark. VOIDD's Pixel Stretch does all three and runs without a download or an account. Desktop editors can produce the same effect with more steps and a subscription.
Can I add a motion trail to a photo without Photoshop? Yes. Upload the photo to the free Pixel Stretch tool, click Select Product to cut out the subject, drag a stretch band away from the direction of travel and export. The steps a Photoshop tutorial does by hand, selection, duplicate layer, directional smudge, happen automatically.
What is the difference between motion blur and a motion trail? Motion blur softens the object itself and costs you detail. A motion trail keeps the object sharp and adds a streak behind it. For product images the trail is usually the better choice because the logo, texture and shape stay legible while the image still reads as moving.
How long should a motion trail be? Start at about a third of the product's width for a drifting or floating feel. Roughly the full width reads as thrown. Longer than that reads as falling or launched. Match the length to the verb you want the viewer to feel, and keep every trail in the image pointing the same way.
Can I add more than one trail to the same photo? Yes. Each stretch band in Pixel Stretch is its own layer, and only the active band responds to the mouse, so you can add a second or third trail without disturbing the first. Keep them all pointing in the same direction so the image still reads as one movement.